 Editor Solar
On-grid diagram with microinverters
Editable on-grid template with microinverters: one per panel, AC trunk cable, bidirectional meter and Wi-Fi monitoring. Adapt it online.
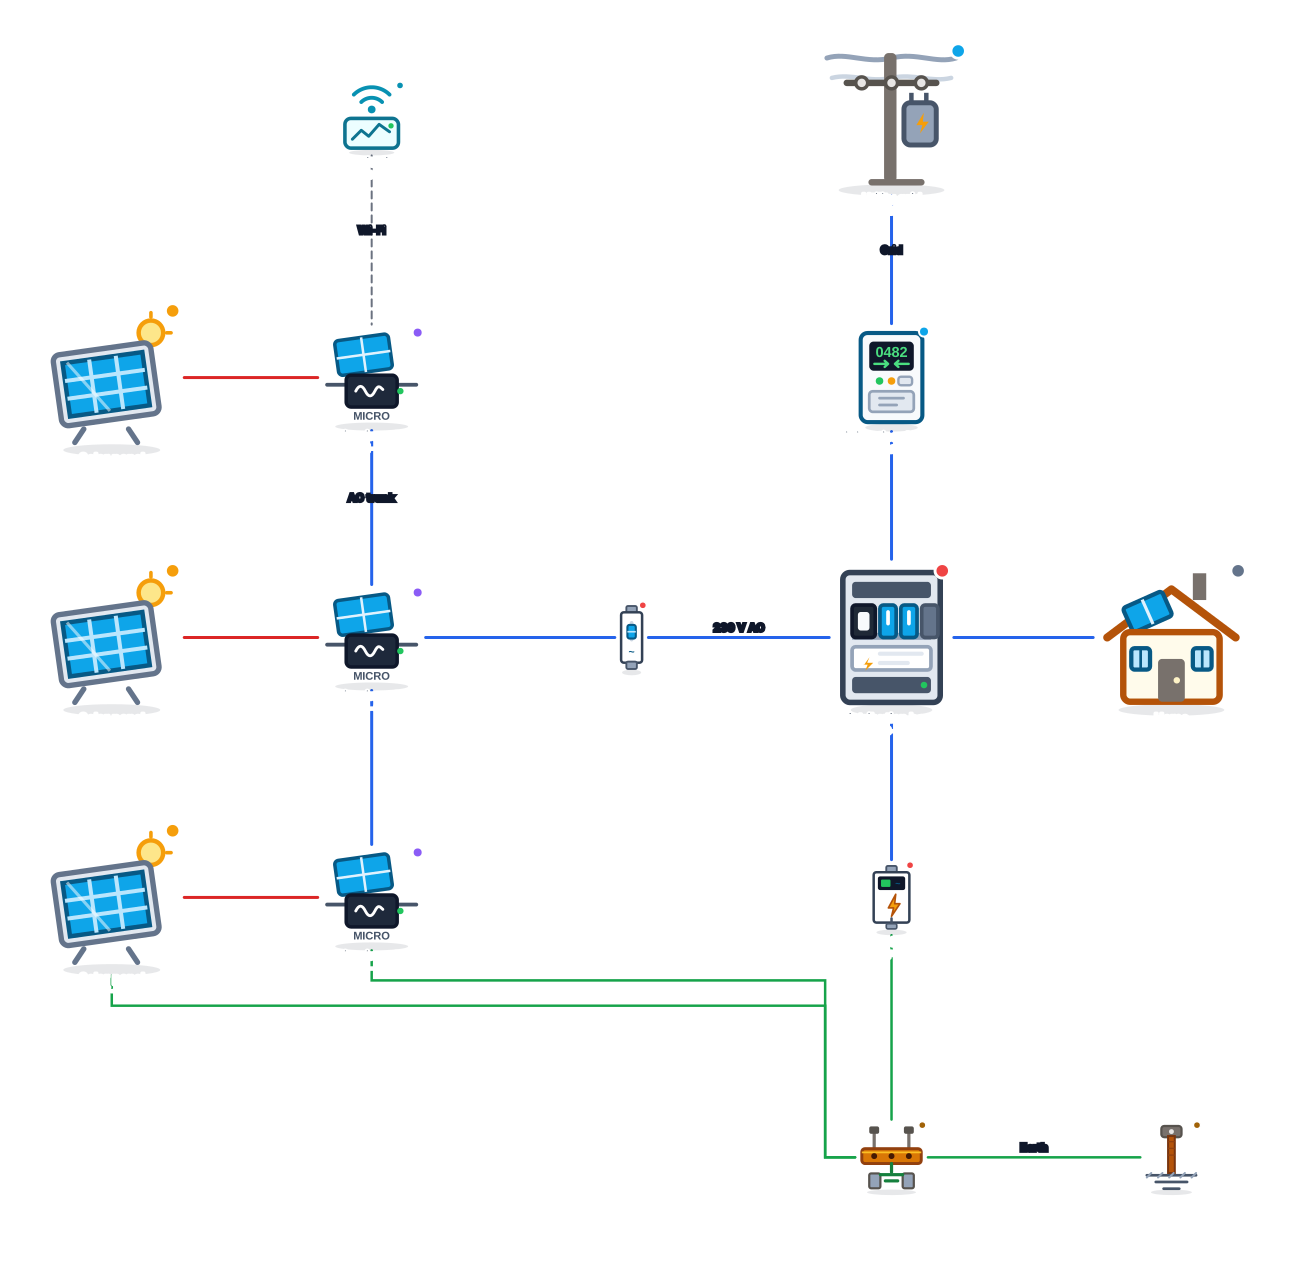
What the diagram shows
In this template, each panel has its own microinverter, installed next to the module on the roof. The conversion to alternating current happens right there, and the microinverters are linked together by an AC trunk cable that runs down to the home’s board.
The diagram shows three panels, each with its microinverter, the AC trunk to the breaker and the distribution board, the bidirectional meter and the grid, as well as a monitoring module connected over Wi-Fi, the AC SPD in the board and the earthing, which bonds the panel and microinverter enclosures.
Diagram components
- 3× Solar panelSingle PV module. Building block of the array.
- 3× MicroinverterCompact inverter mounted at the module.
- AC breakerBreaker for alternating-current circuits.
- Distribution boardSystem distribution and protection board.
- Bidirectional meterBidirectional energy meter (generates and consumes).
- Utility gridConnection point to the utility.
- HomeResidential consumer unit.
- MonitoringDatalogger or monitoring module (Wi-Fi, app).
- AC SPDSurge protector for alternating current.
- Earth busbarEarth equipotential bonding busbar.
- Earth rodEarth (ground) rod driven into the soil.
How it works, step by step
- Each panel works on its own: the microinverter tracks the maximum power point (MPPT) of a single module.
- AC trunk: the microinverter outputs are daisy-chained by an alternating current cable.
- Board and metering: the trunk reaches the breaker and the home’s board; the surplus goes to the grid through the bidirectional meter.
- Monitoring: a gateway or datalogger shows the output of each panel in an app.
When to choose microinverters
Microinverters are recommended for roofs with partial shade (trees, chimneys, neighboring buildings) or with several orientations, because shade on one module does not pull down the output of the others. They also remove high-voltage direct current from the roof and make it easy to expand the system step by step.
In exchange, the cost per watt is usually higher and there is more electronics exposed to the roof heat. The tutorial on panel strings compares both approaches.
Tips to adapt the template
- Add more solar panel + microinverter pairs and continue the AC trunk to the last one.
- Use a "Roof" area around the panels and microinverters.
- If you use two- or four-module microinverters, connect several panels to the same microinverter.
- Replace the microinverters with optimizers and a central inverter to represent the other solution for shade.
Frequently asked questions
Is a microinverter better than a string inverter?
It depends on the roof. On roofs with shade or several orientations, microinverters usually yield more. On clear, well-oriented roofs, the string inverter tends to have a lower cost per watt.
How many panels fit on one microinverter?
There are models for one, two or four modules. The panel power must be compatible with the microinverter input stated by the manufacturer.
How do I know if a panel has stopped working?
The monitoring system shows the output of each microinverter in the app, which makes it easy to find a dirty, shaded or faulty module.
Edit this template in Editor Solar
The template is already open in the editor below. Move the equipment, change labels, add protection devices and export to PNG, SVG or PDF, free and without signing up.
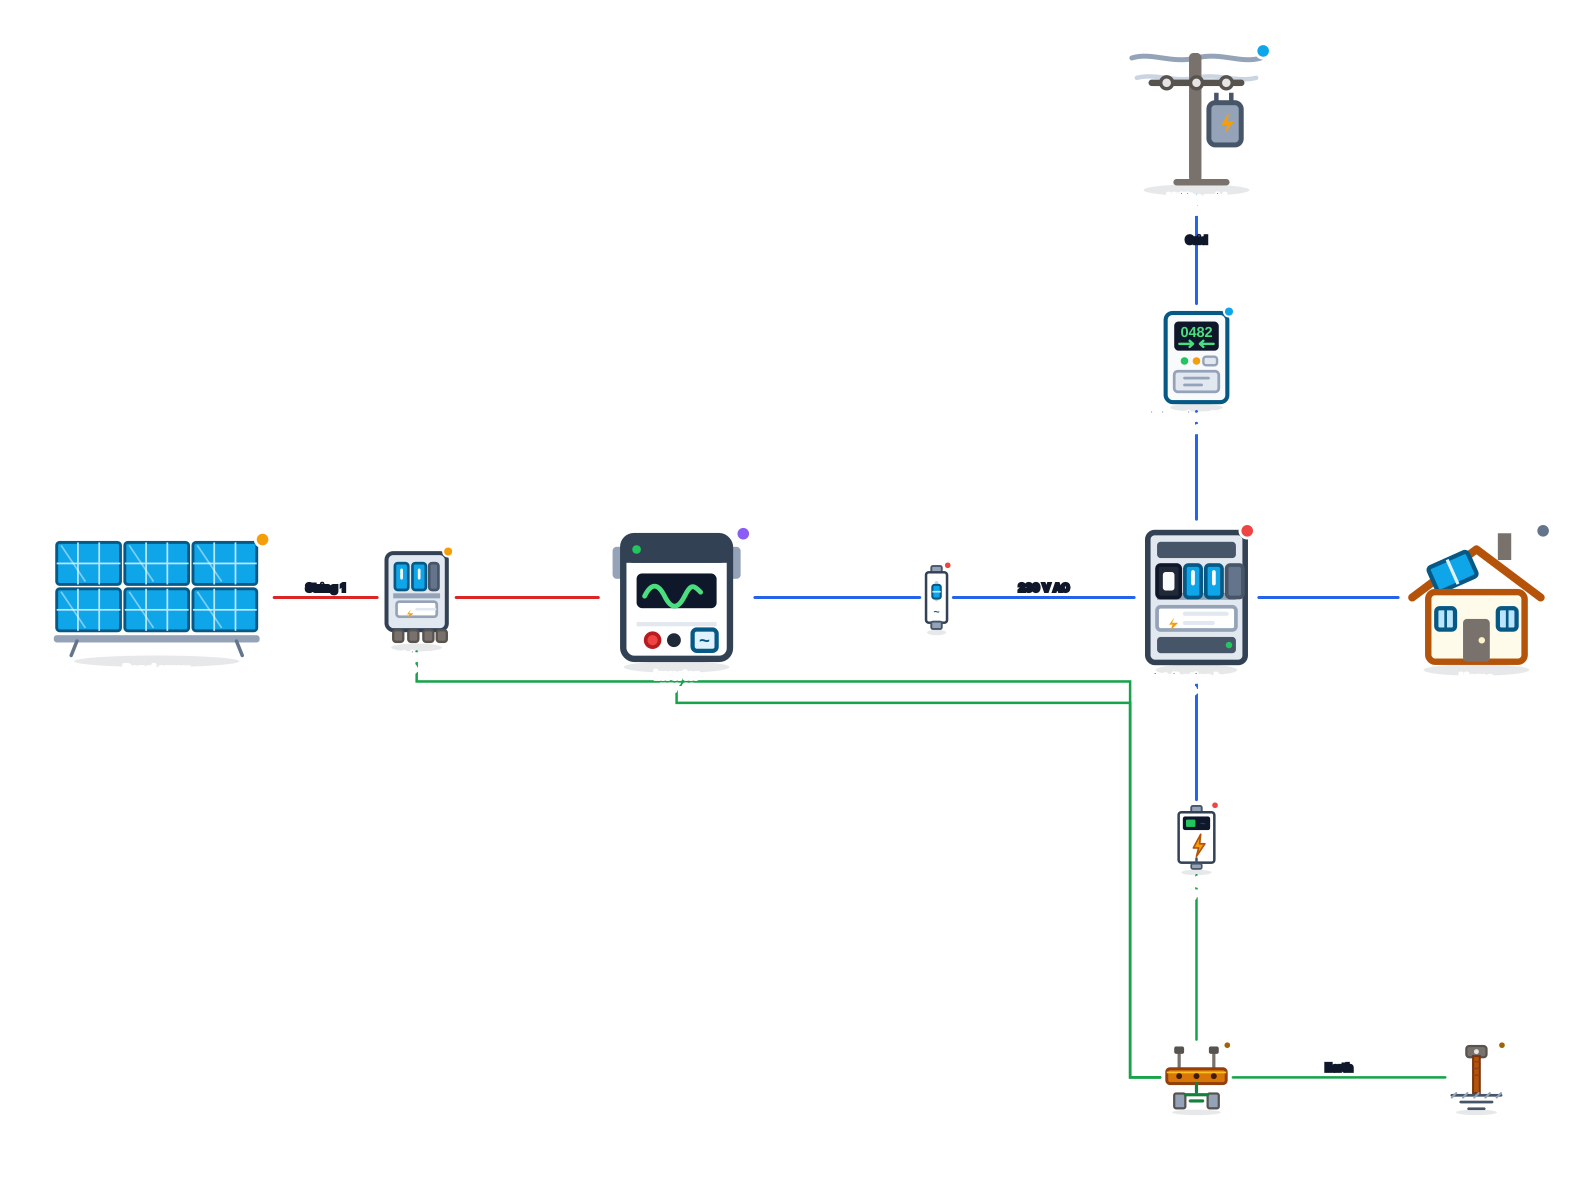 On-grid (grid-tied) solar system diagram
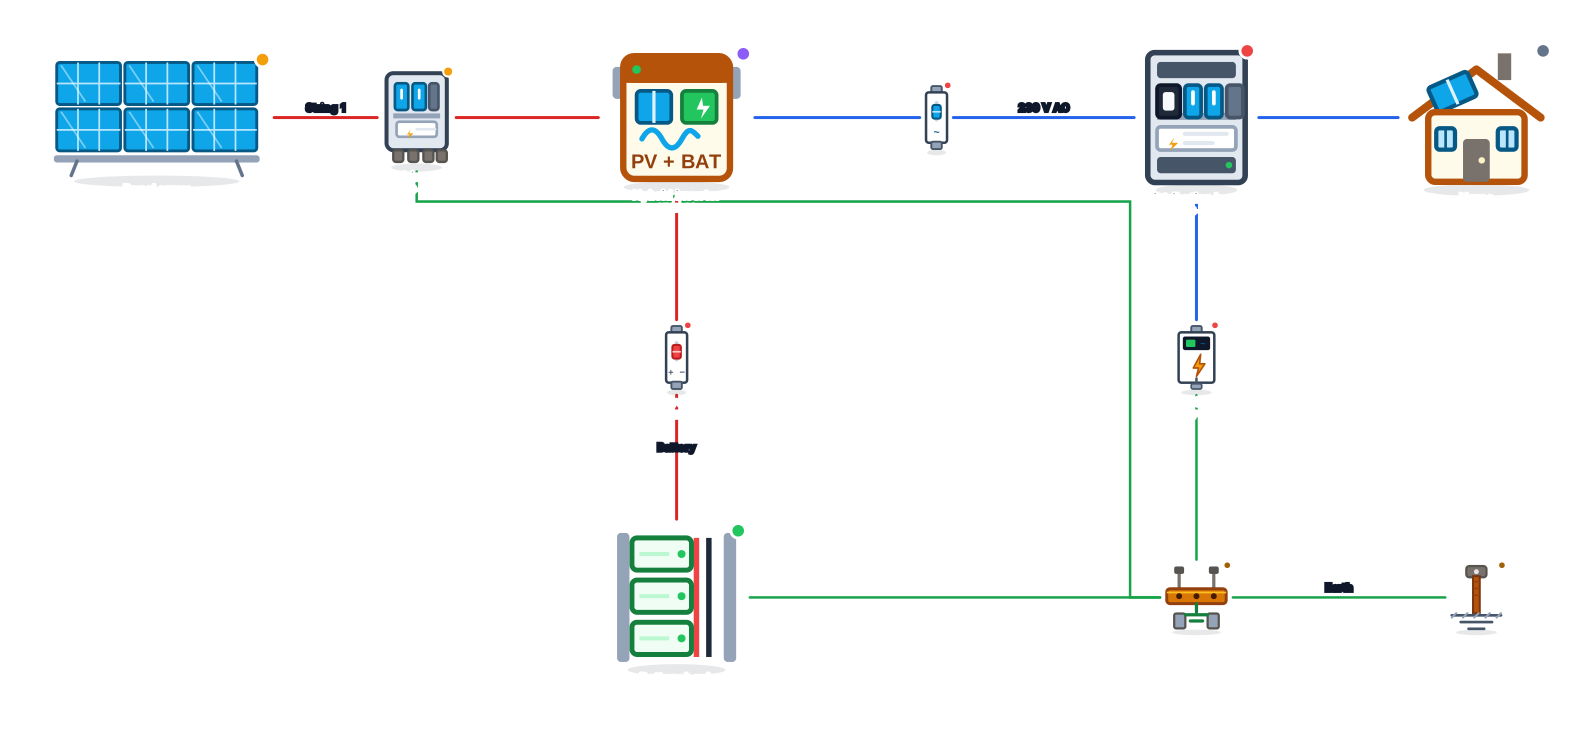 Solar system with battery diagram (no grid)
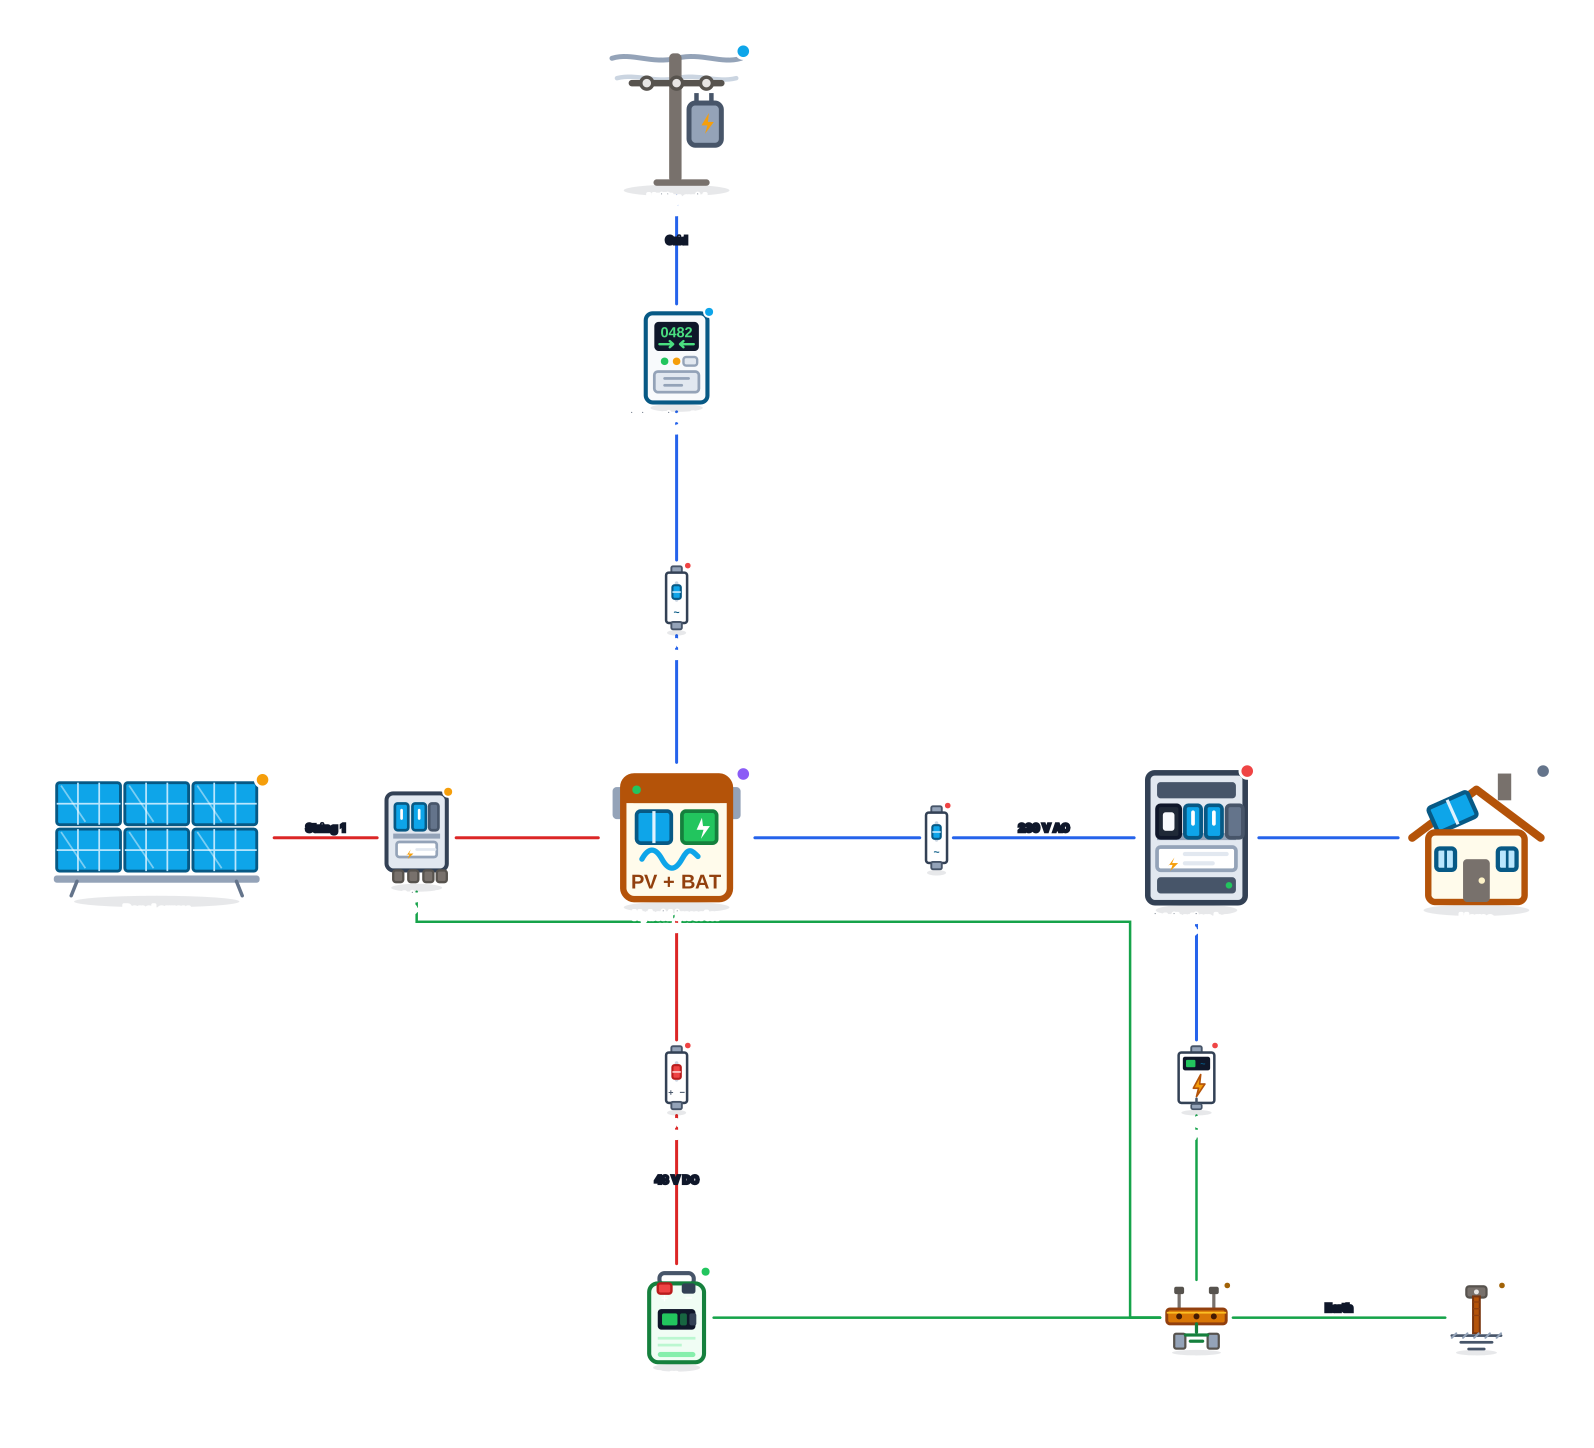 Hybrid inverter with battery and grid diagram
 Off-grid (stand-alone) solar system diagram
 Home battery backup diagram
 Off-grid system with generator and ATS diagram
 Hybrid solar and wind system diagram